VEEAM for Office 365
30 November 2019Thank you for reading this post, don't forget to subscribe!
Prerequisites
- CPU: any modern multi-core x64 processor, minimum 4 cores
- Memory: 8 GB RAM minimum.
- Disk space: 500 MB for product installation.
- Only 64-bit versions of the following operating systems are supported:
- Microsoft Windows Server 2019
- Microsoft Windows Server 2016
- Microsoft Windows Server 2012 R2
- Microsoft Windows Server 2012
- Microsoft Windows Server 2008 R2 SP1
- Microsoft Windows 10
- Microsoft Windows 8.x
- Microsoft Windows 7 SP1
- Microsoft .NET Framework 4.7.2 or higher.
- Windows C Runtime and Update (UCRT).
- Windows PowerShell version 2.0 or later.
Assigning the Application Impersonation Role Using PowerShell
[cc lang=”powershell” tab_size=”2″ lines=”40″]
$Session = New-PSSession -ConfigurationName Microsoft.Exchange -ConnectionUri https://outlook.office365.com/powershell-liveid/ -Credential $Credential -Authentication Basic -AllowRedirection
Import-PSSession $Session
[/cc]
[cc lang=”powershell” tab_size=”2″ lines=”40″]
New-ManagementRoleAssignment –Role ApplicationImpersonation –User user.name@domain.com
[/cc]
Veeam installation for Office 365
We will download Veeam for Office 365
Once downloaded, we will install Veeam Backup365
- We will install Veeam Explorer For Exchange
- We will install Veeam Explorer For SharePoint
Veeam configuration for Office 365
- We will launch Veeam Backup for Microsoft Office 365

- We will leave the default settings
Veeam License for Office 365
Once connected, veeam informs us that the product is not licensed, we will see how to add a license.
We will select install, a window will appear
Select your license that ends in.Lic
Proxy configuration
In our case we have no proxy, you can set one if you have one
Configuring the repository
We will add a new repository
We will select in our case the E disk, which has 2TO dedicated to backup
We will set the retention at 90 days, usually my clients leave 3 years, everything will depend on your resources
We will delete the repository created by default
Organization configuration
We will select Add org
We will select in our case Office 365
We are going to fill in the identifiers of the account which has the rights on the tenant office 365
Configuration Backup Job
We will select add backup job
We will select in this case the entire organization, you (have the option to specify the users).
It will be necessary to take into account the fact of specifying the user will make impossible the automatic addition of a new USER in the backup plan
Restoring a Veeam Backup for Office 365
We will select Explore => Explore Latest Exchange …
We will provide the account that has the rights
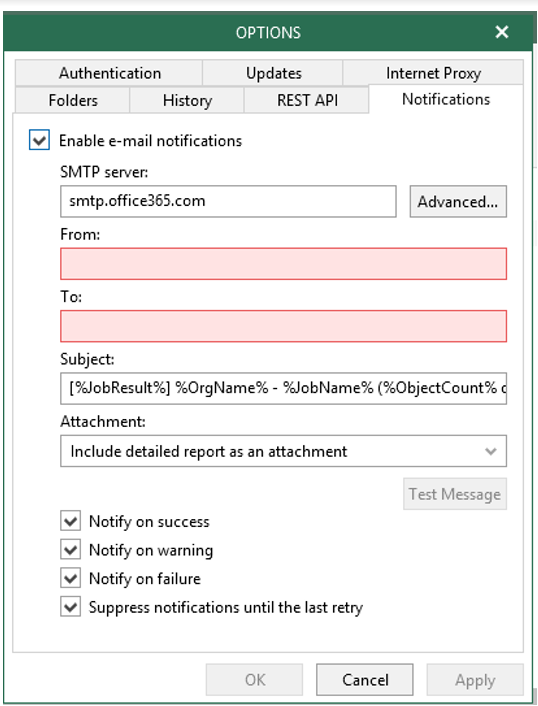
Options Configuration
We go on General options
Here’s our tutorial ends Here,
Views: 722


