
Install a DFS root server
19 November 2019Thank you for reading this post, don't forget to subscribe!
installing DFS
- We go on: “Dashboard” => “Server Manager”
- “Manage” => “Add roles and features”.
- DFS Namespaces:

Choose the server on which to install the DFS role.
In the next window, look for “File and Storage Service” => “File and iSCSI Service”. => “DFS Namespaces”.
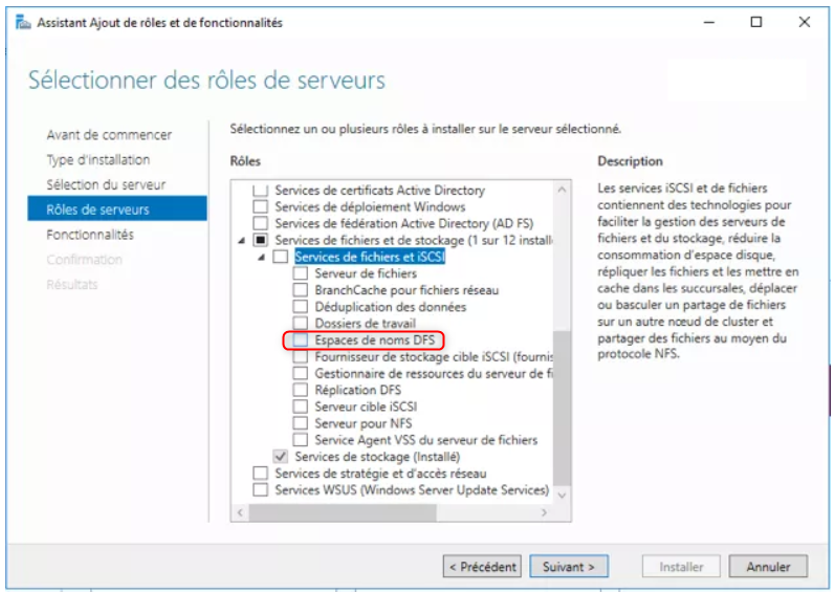
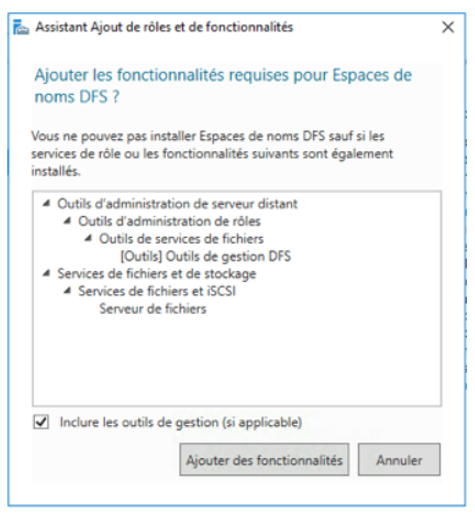
We will click on “Add Features”
We will click “Next” until Install
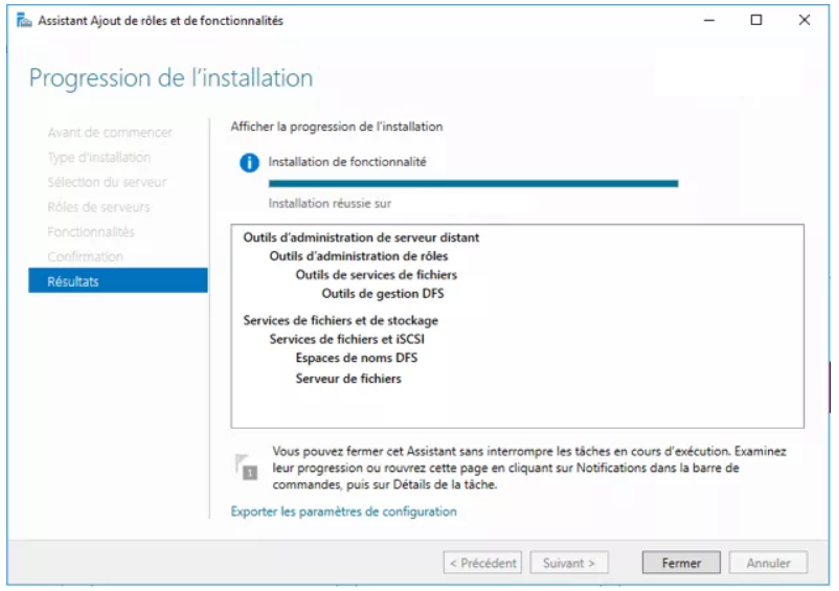
Creating a DFS Namespace
We will now create a namespace.
- In the “Server Manager” window => “Tools”
- “DFS Distributed File System Management”.
- We will right click on “Namespaces” => “New namespace …”.
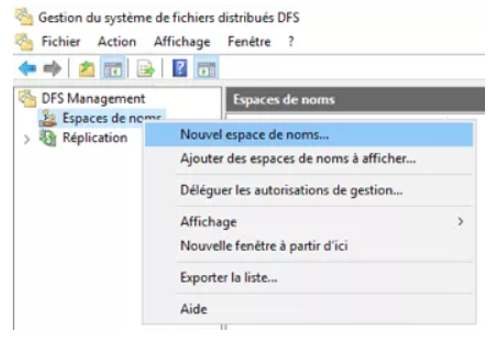
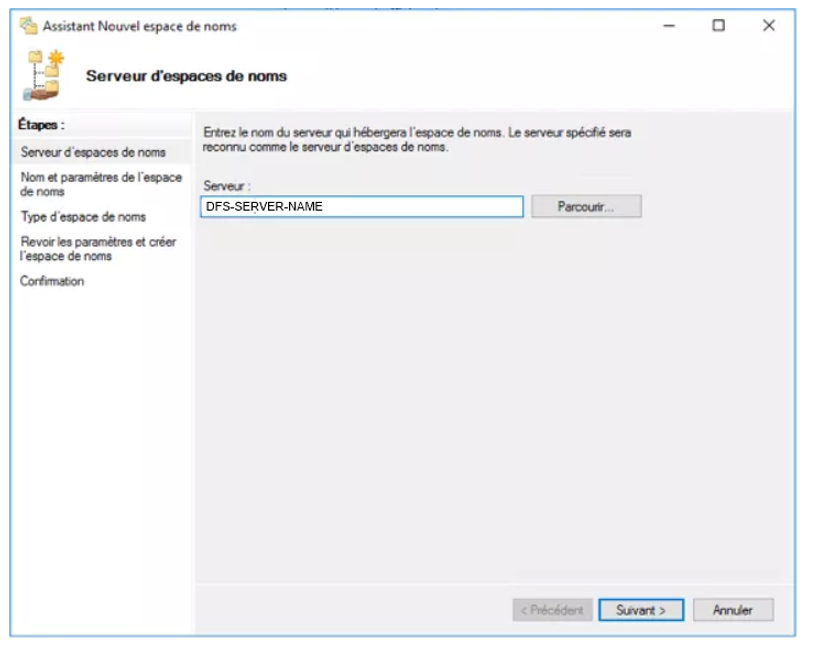
- We will enter the name of the server that will host the namespace
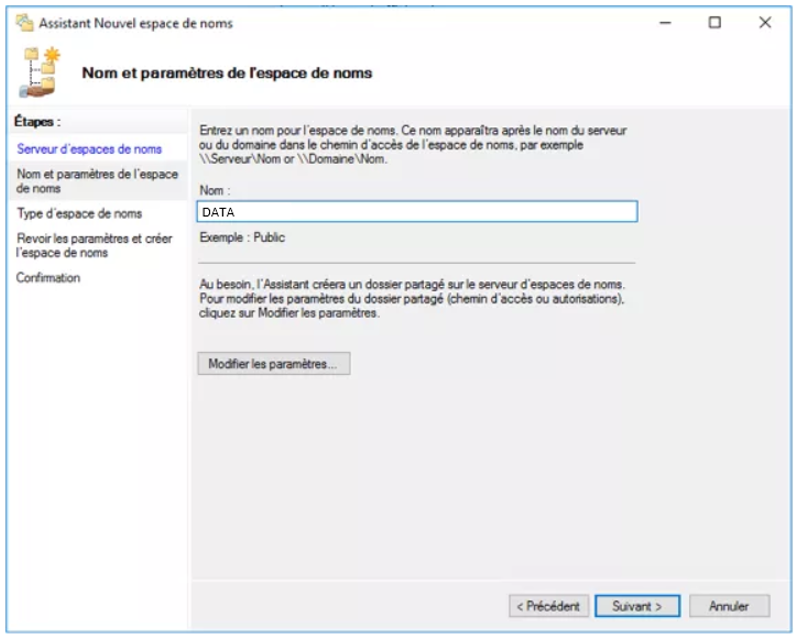
- We will enter the name of the namespace.
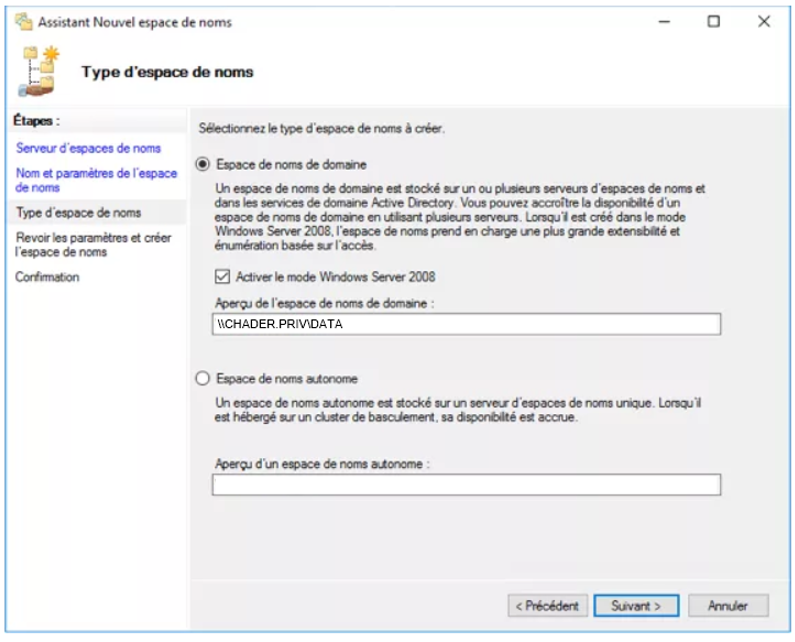
- We will choose “Domain Name Space”
- We will click on “Create”.
Creating a new folder
Now that the namespace is created, we will add a folder.
- Right click on your namespace, and click on “New Folder”.
- Give your folder a name, and click on “Add”.
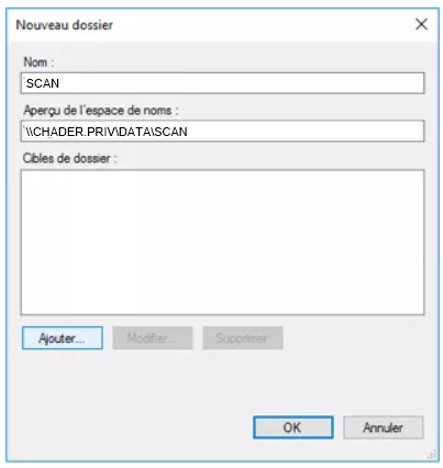
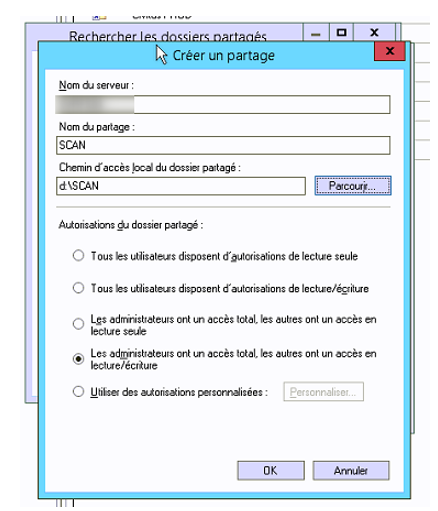
- Enter the name of the server hosting your shared folder, and click “Browse.”
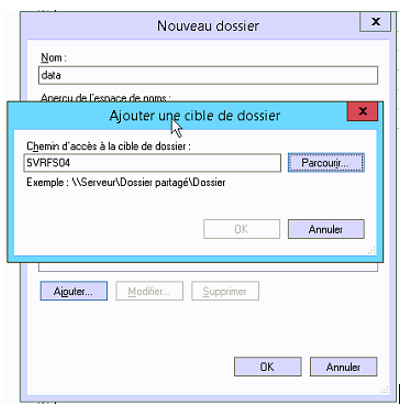
- New shared folder
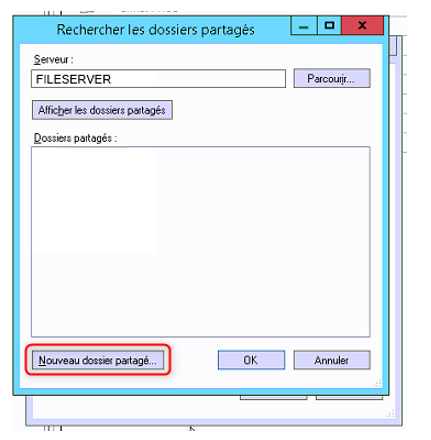
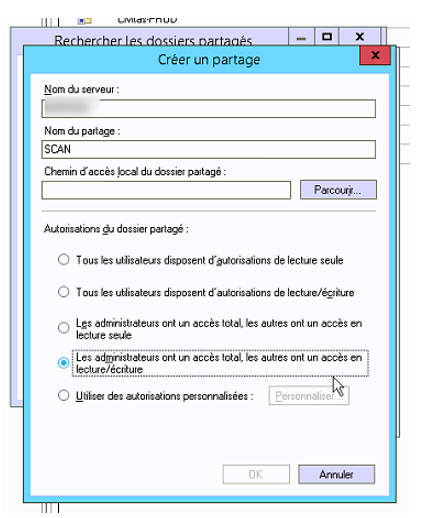
- We will give a name to the share
- Give Full Access to Administrators
Click on browse
- We will select the disk or we want to create the folder
- Click create a new folder in our case it’s SCAN
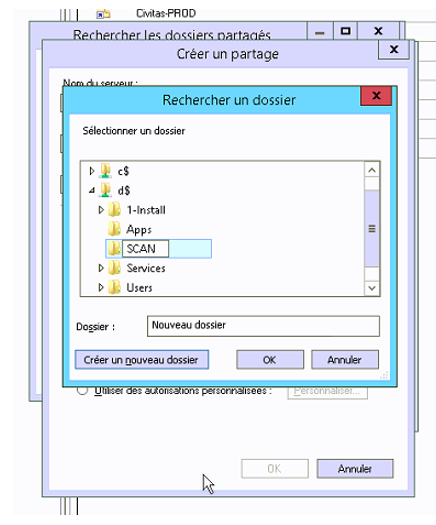
- Click OK
Manage folder permissions
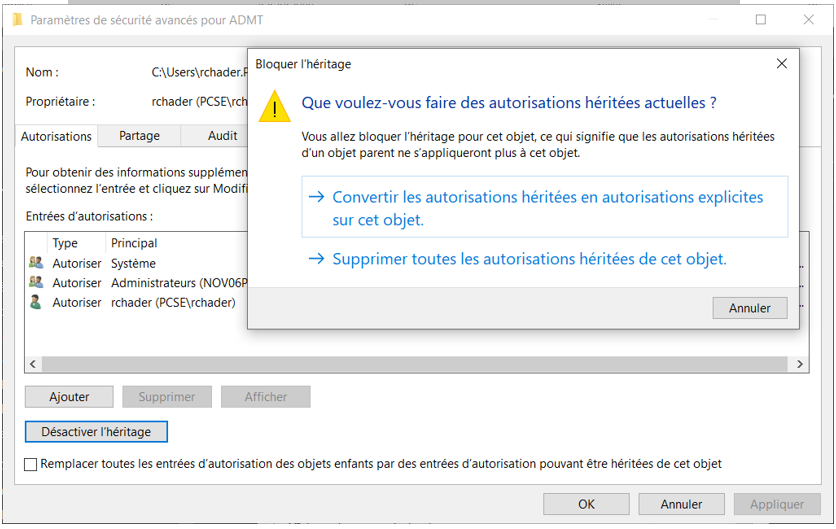
We can modify the permissions directly from the folder created previously, it will be necessary:
- Disable the inheritance on the folder
- Put the rights without forgetting to add the admins of the domain in total control.
- Here is our root DFS is configure
Views: 6564


